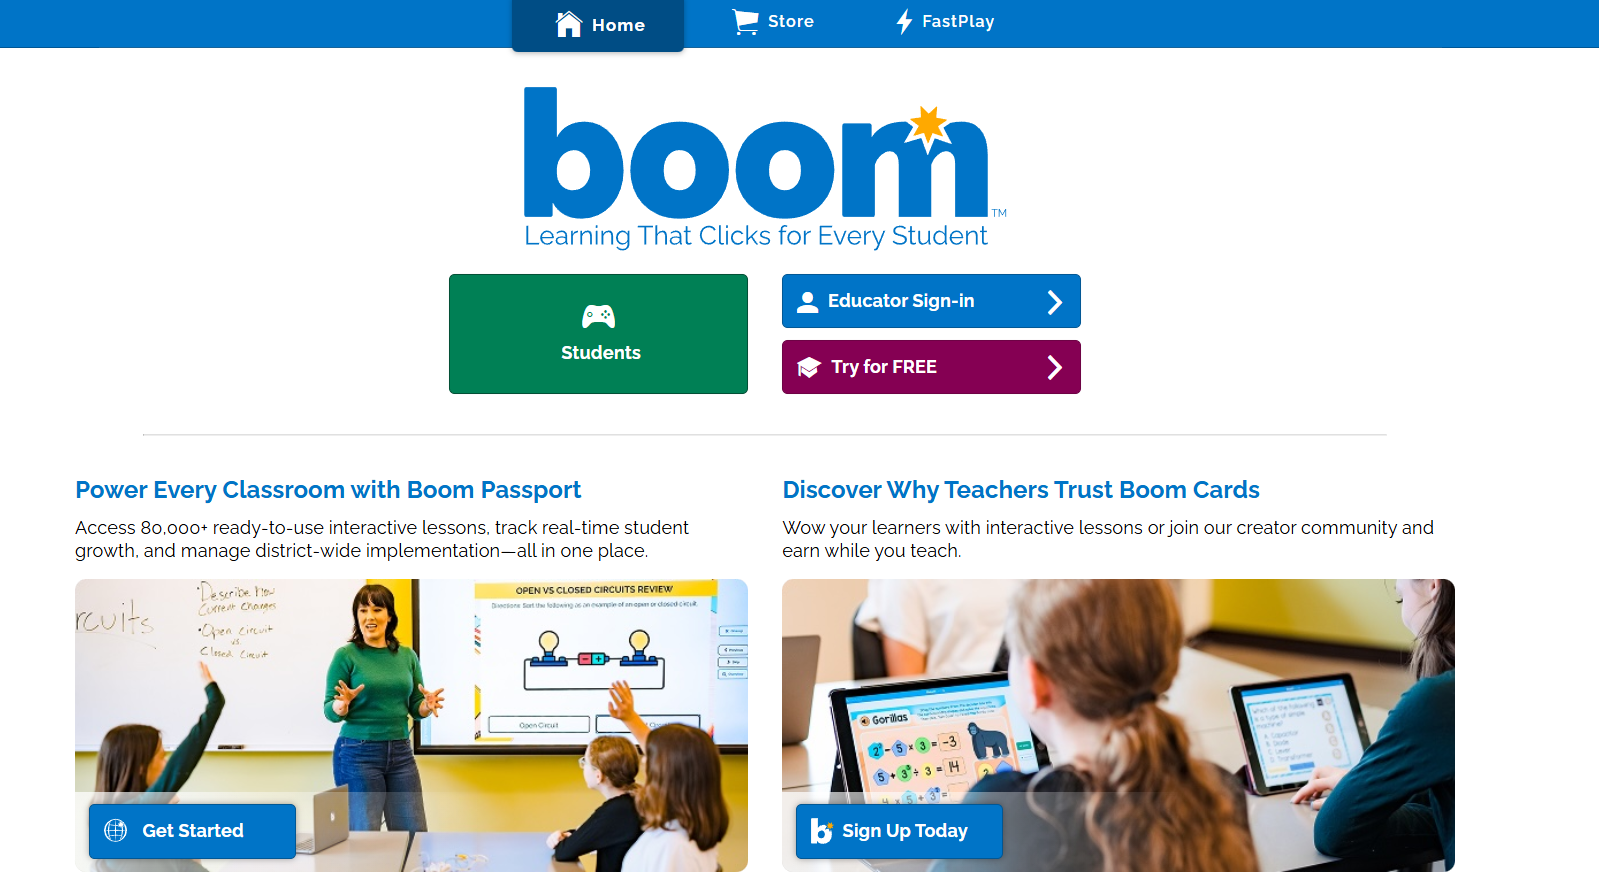
Today I wanted to share with you my latest classroom obsession – Boom Cards! Boom Cards are interactive digital resources that your students can use on any internet-connected device.
In this day and age, classrooms are being flooded with technological tools with a push towards one-to-one accessibility. While this is wonderful and engaging for the students, sometimes as teachers, it’s hard to know where to begin.
A couple of years ago, I started making digital resources for my classroom within Google Drive. The process was laborious, and I couldn’t add sound or provide any self-check. Students still needed too much assistance through the process. I needed more independent activities for them, as I worked with small groups.
After learning about, using, and creating Boom Cards, I finally felt like I had found the tool that I needed to make digital learning accessible for my students!
In this blog post, I’d like to provide you with a brief overview of Boom Cards, explain how they work, and offer a simple how-to guide on setting them up in your classroom.
Creating an account
The first step is to create a free account. There are many things you can do with a free account. Just follow the link below:
Create a Boom Learning Account!
After creating your free account, you will need to decide on the type of membership you would like.
Choosing a Membership
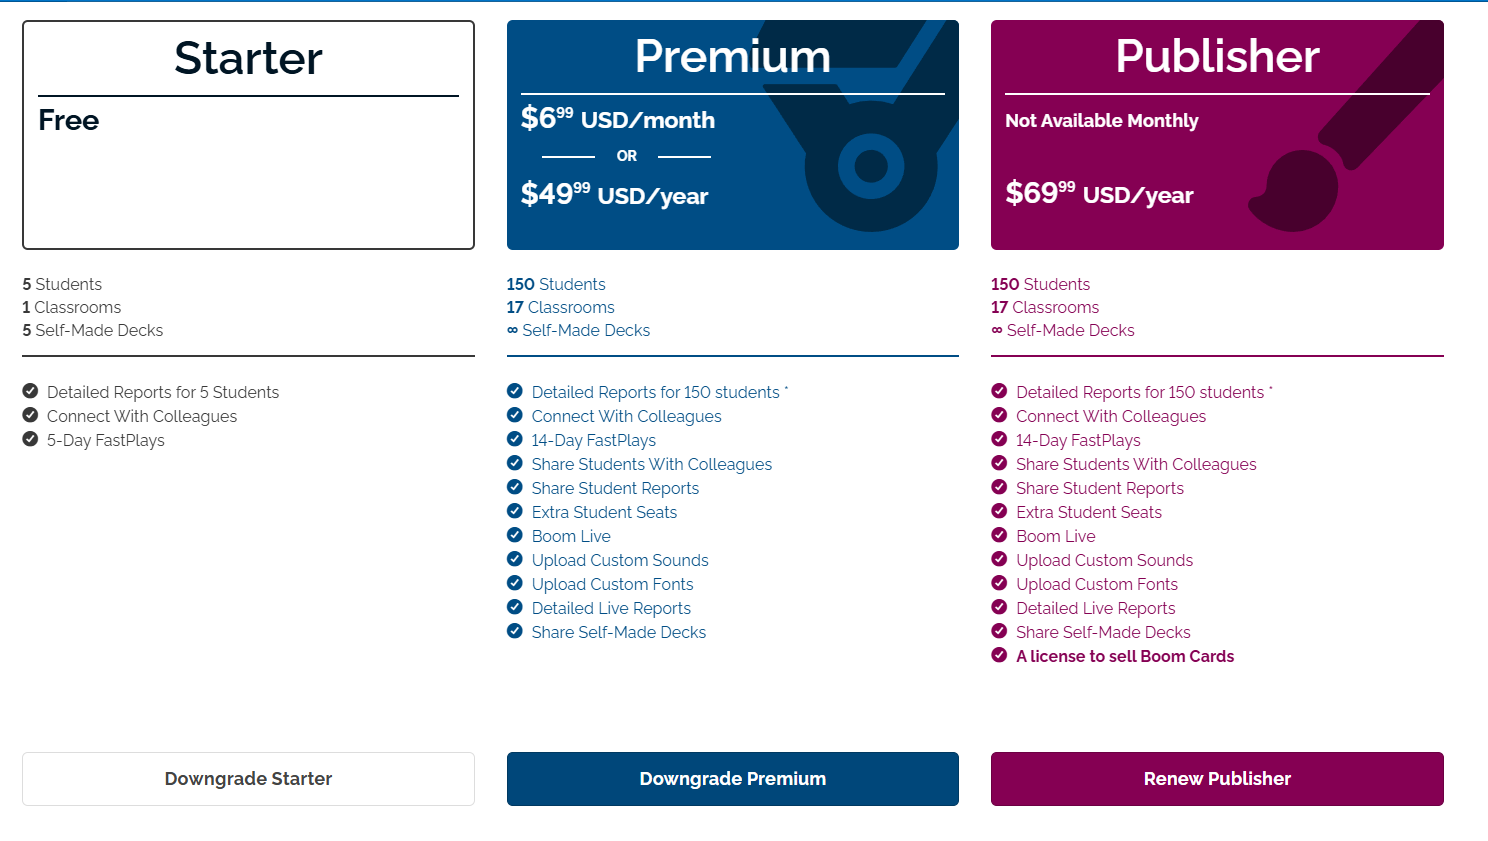
Before you choose which membership you would like, you need to know some basic vocabulary that the site uses:
Classrooms – The number of classes that you can create. If you are in a self-contained classroom, you might only want one classroom, while middle school and high school teachers would obviously have more. Classrooms can also be a great way to differentiate. Group your students by academic need, and you can push different assignments to different-level groups.
Decks – Each product available on the website is referred to as a deck. They contain a set of task cards that typically focus on a specific skill. Private decks are decks that you create yourself, that live in your library. Creating your own deck is easy and a whole lot of fun once you get the hang of it. If you want to make decks and sell them to other teachers, then you would pick the Ultimate membership to make a public deck.
Points – When you wish to purchase a deck of cards, you look to see how many points it costs and how many points are in your account. Depending on the membership you choose, you will start out with some points and can spend those as you see fit. Once those points are used up, you can purchase more points within the store. Think about it like reloading your Starbucks card : )
Okay, you’ve got your account and membership squared away, so now it’s time to start adding students under the Classes tab.
Setting up a Classroom
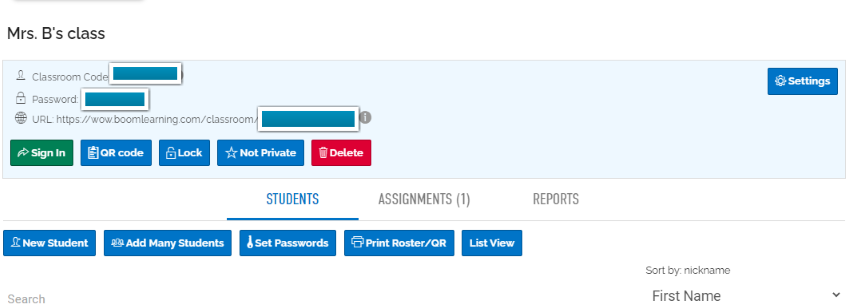
You can add students individually or as a group under this tab. You can also import existing classes from the following sites: Google Classroom, Microsoft, Clever, ClassLink, or Canvas. Boom Learning provides every student with a customizable avatar that they can change once they log in. You can change the usernames and passwords as needed. Try and keep as many usernames and passwords the same across all digital learning platforms to make it easier for the students.
Under this tab, you can assign work to students individually or as a group. I will show you another location where you can do that as well in just a little bit.
Now it’s time to spend your points; you can head on over to the store.
Downloading Boom Cards
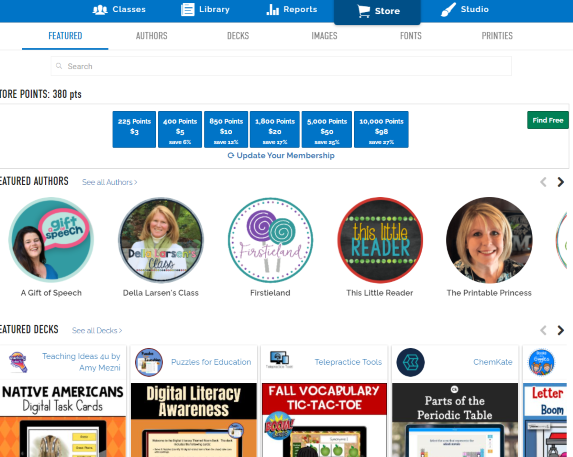
There are numerous decks to choose from, and more are being added every day. Cards can be used for whole-class instruction, intervention work, guided reading, centers, early finishers, and homework. Truly, the possibilities are endless.
Want to try out a sight word freebie that I made just for you? Fill out the info below to get the link to the free deck!

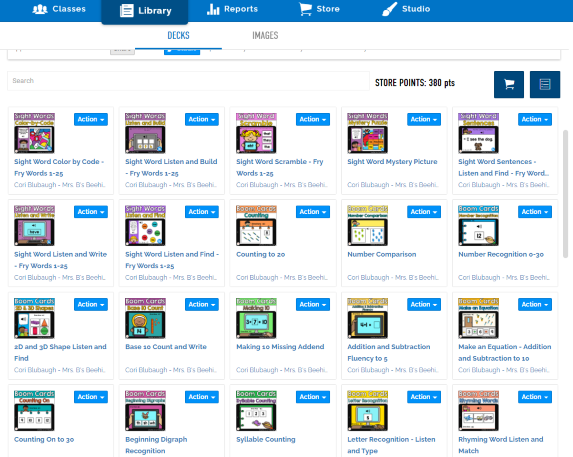
Once you make a purchase or download a free product, it will be added to your library.
Assigning Boom Cards
You can click on each deck and decide what you would like to do with it.
Assign – You can assign it to any class you have set up. To assign it to an individual student, navigate to the Class tab and click on that student’s name.
Fast Pin – This allows your students quick access to the cards, eliminating the need for login. Doing this can make things faster, but you won’t get the reports on how the student did with the cards.
Hyperplay Link – If you want to attach this deck of cards to another document, you can get the link here.
Print – prints out PDF versions of the cards.
Custom play settings – you can choose different options for your students, such as showing the answer when they get it wrong or allowing multiple plays of the same deck.
View reports – you can check out your students’ statistics on this particular deck.
Once you have assigned a deck, you can have your students log in to their accounts:
Student Access

On the Boom Learning main page, you will find a green button for student sign-in. When the students click that, they will be prompted to sign in through Boom, Google, Microsoft, or Clever.
You can see from the homepage, at the very top of this post, that students can either click the sign-in button or the Fast Play button. You can also choose the fast play option after you hit the log-in button.

If you choose fast play, the students enter the PIN you provided and can quickly access the deck you want them to play. Don’t forget that with fast play, you won’t receive any report tracking.
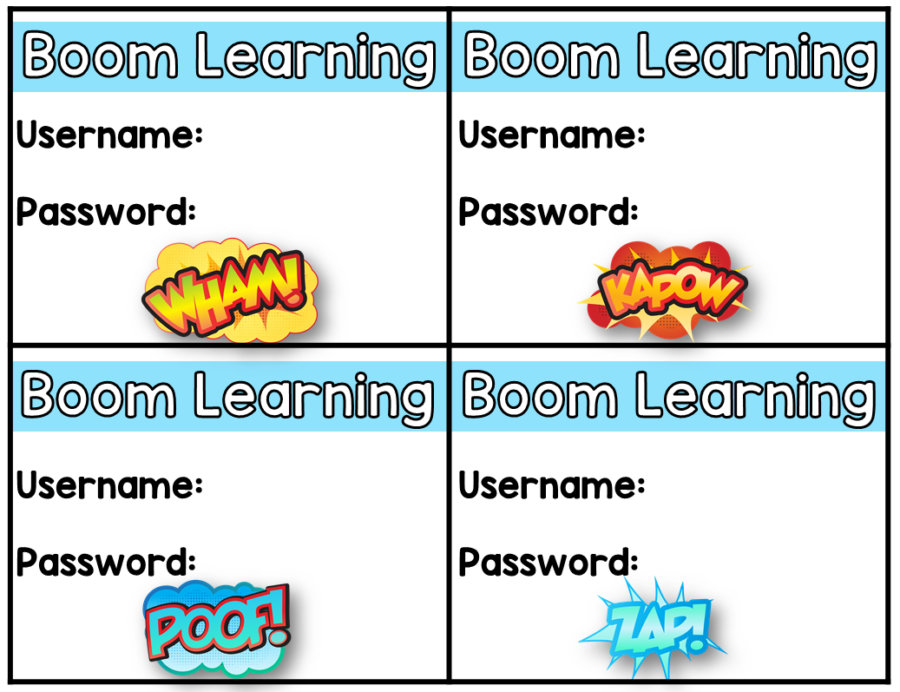
I created some editable Boom Learning sign-in cards to help you keep track of your students’ usernames and passwords more easily. I like to keep these on a metal ring by my computers. Cards can also be kept in students’ personal folders. If you would like a free copy, click on the link below:
Boom Learning Username Cards
Students will log in and see the cards assigned to them, then click on the correct one.

Once they are done with a deck, it will prompt the student to play again or go back to the home page, where they can choose another deck.
After the students complete the assignment, you can review their progress in the reports tab.
Follow-Up

The reports tab tells you the student’s accuracy level and the amount of time it took them to complete the deck. If the students complete the deck multiple times they will show you their best score overall, and how they did on their most recent attempt.
I love that this reporting tab gives you a quick snapshot of who is struggling with a concept, and who is ready for more challenging material.
Alright, I know that this was a bit of a long-winded post, but I wanted to offer support to teachers or parents who are looking into starting a Boom Learning account.
I truly believe that this resource has the ability to personalize the learning for your students. Teachers know what their kids need, and to be able to pick and choose the skills to present to them while differentiating their learning is priceless.
Please let me know if you have any further questions that I can answer for you. You can find more information below in my other Boom Learning posts and check out the Boom Decks I offer in my store!